Table of Contents
- Interface Language Settings
- Creating a Project
- Adding a Quiz to the Project
- Working with the Quiz
- Working with the Quiz - Workspace Guide
- Quiz Sections
- Creating a Quiz
Creating, posting, and boosting lead generation of an online quiz seems rather easy. However, there are many services on the Internet to create a quiz online, each of which has its own function. Below we will tell you how to create a quiz in Boosting Lead.
1. Interface Language Settings
On the left are user dashboard sections.
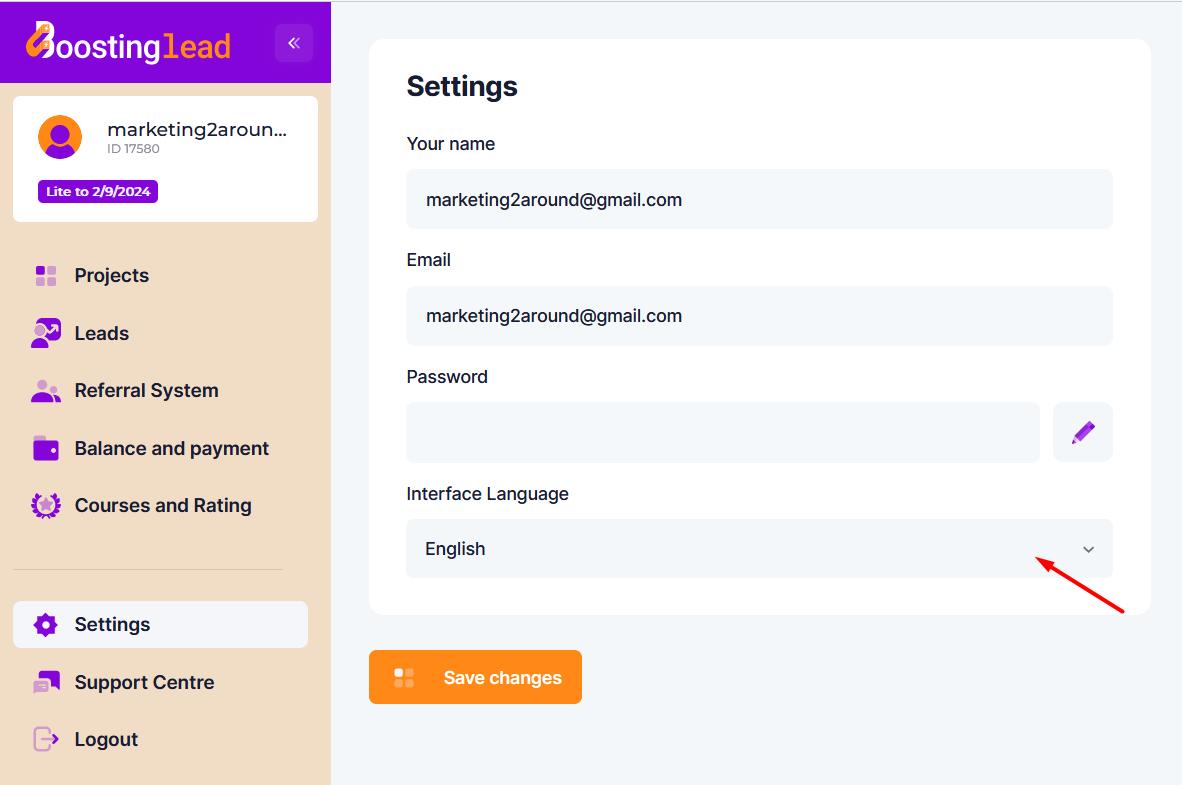
In the Settings section, you can change:
- account password;
- interface language.
2. Creating a Project
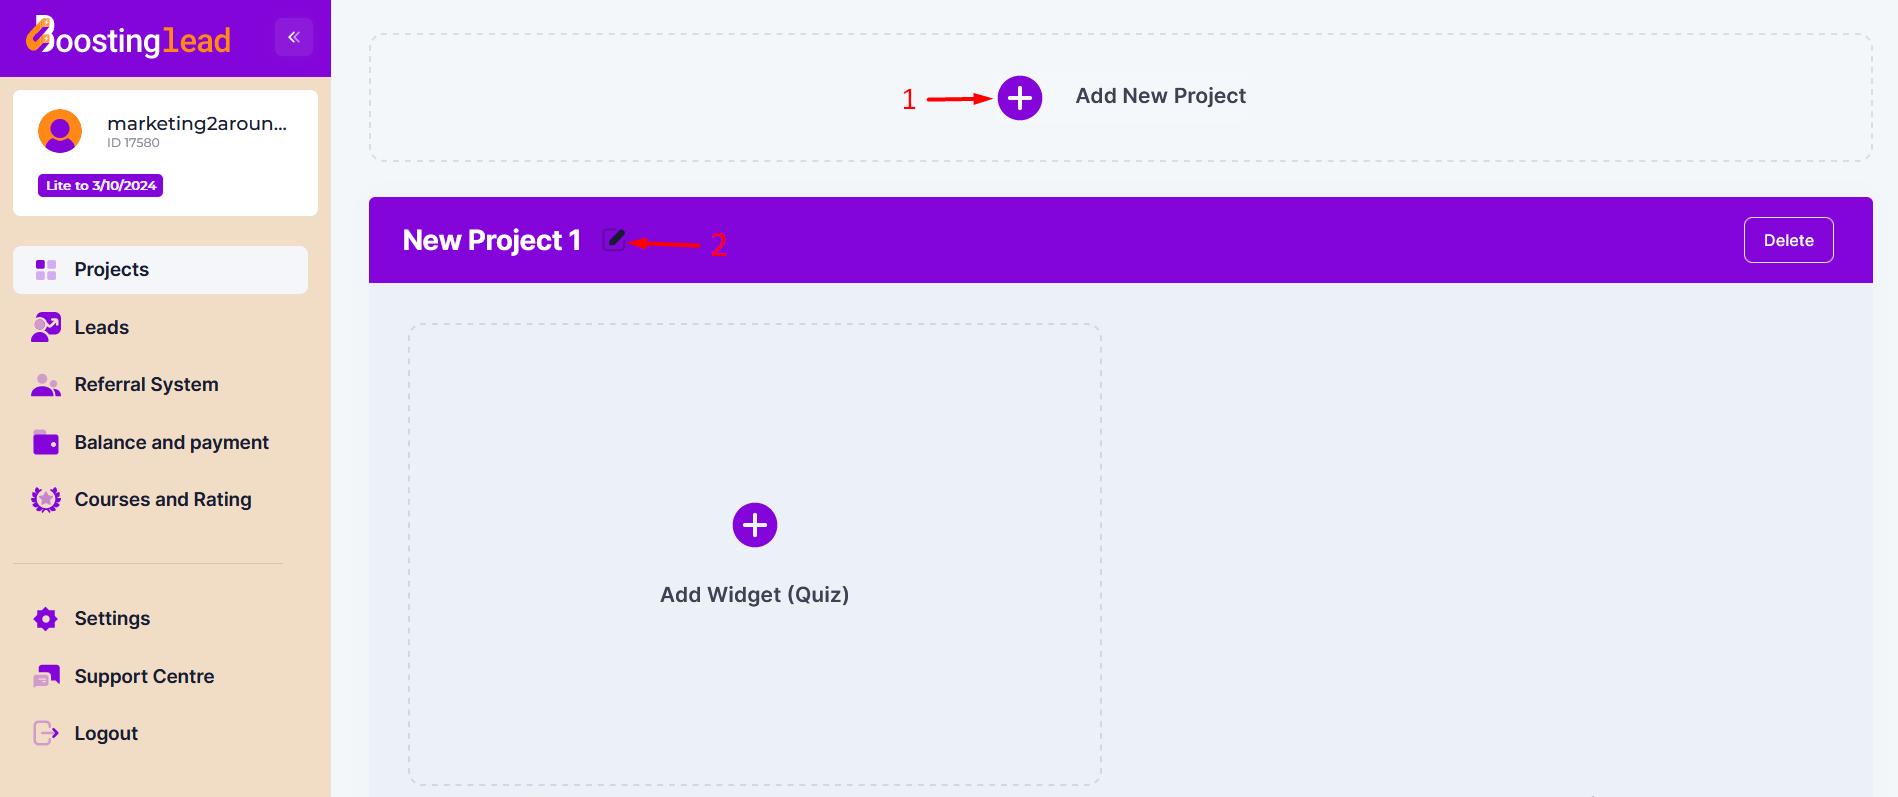
In the Projects section, click on "Add New Project" (1).
By clicking on the project name (2), you can change it as needed.
3. Adding a Quiz to the Project
To create a new quiz:
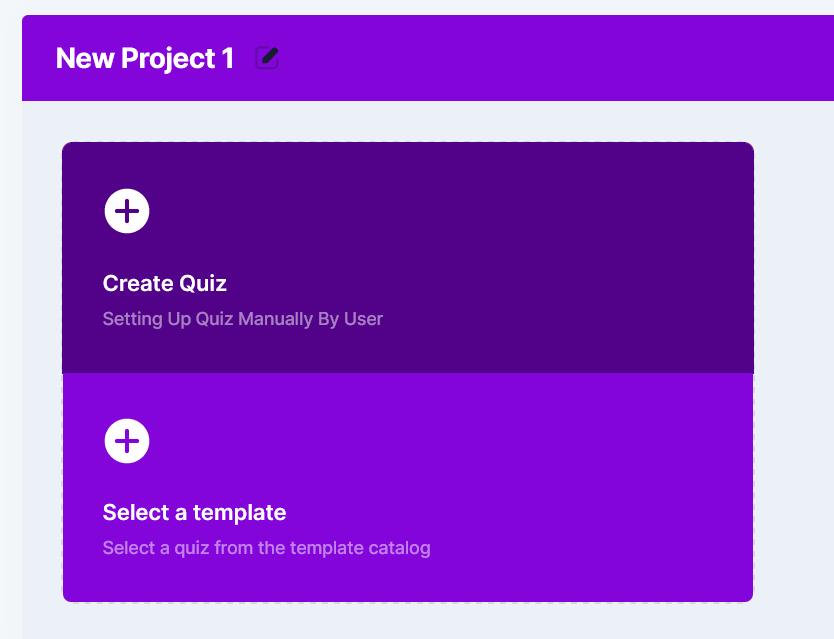
- press the "Add Widget (Quiz)" button in the respective project;
- choose quiz addition option (Create Quiz - a new, user-configured quiz; Choose Template - select a quiz from created templates and add it to the project).
4. Working with the Quiz
A created or added quiz can be:
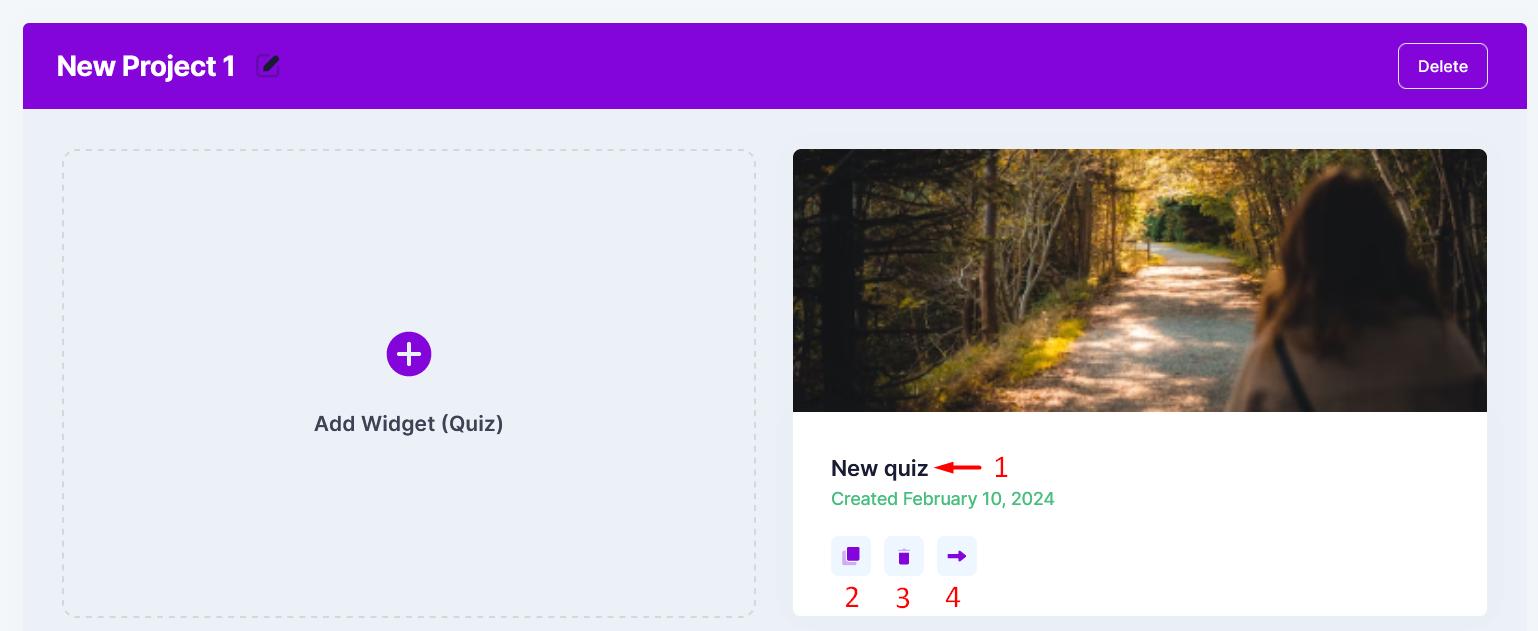
- (1) opened by clicking on its name;
- (2) copied;
- (3) deleted;
- (4) moved to another project.
5. Working with the Quiz - Workspace Guide
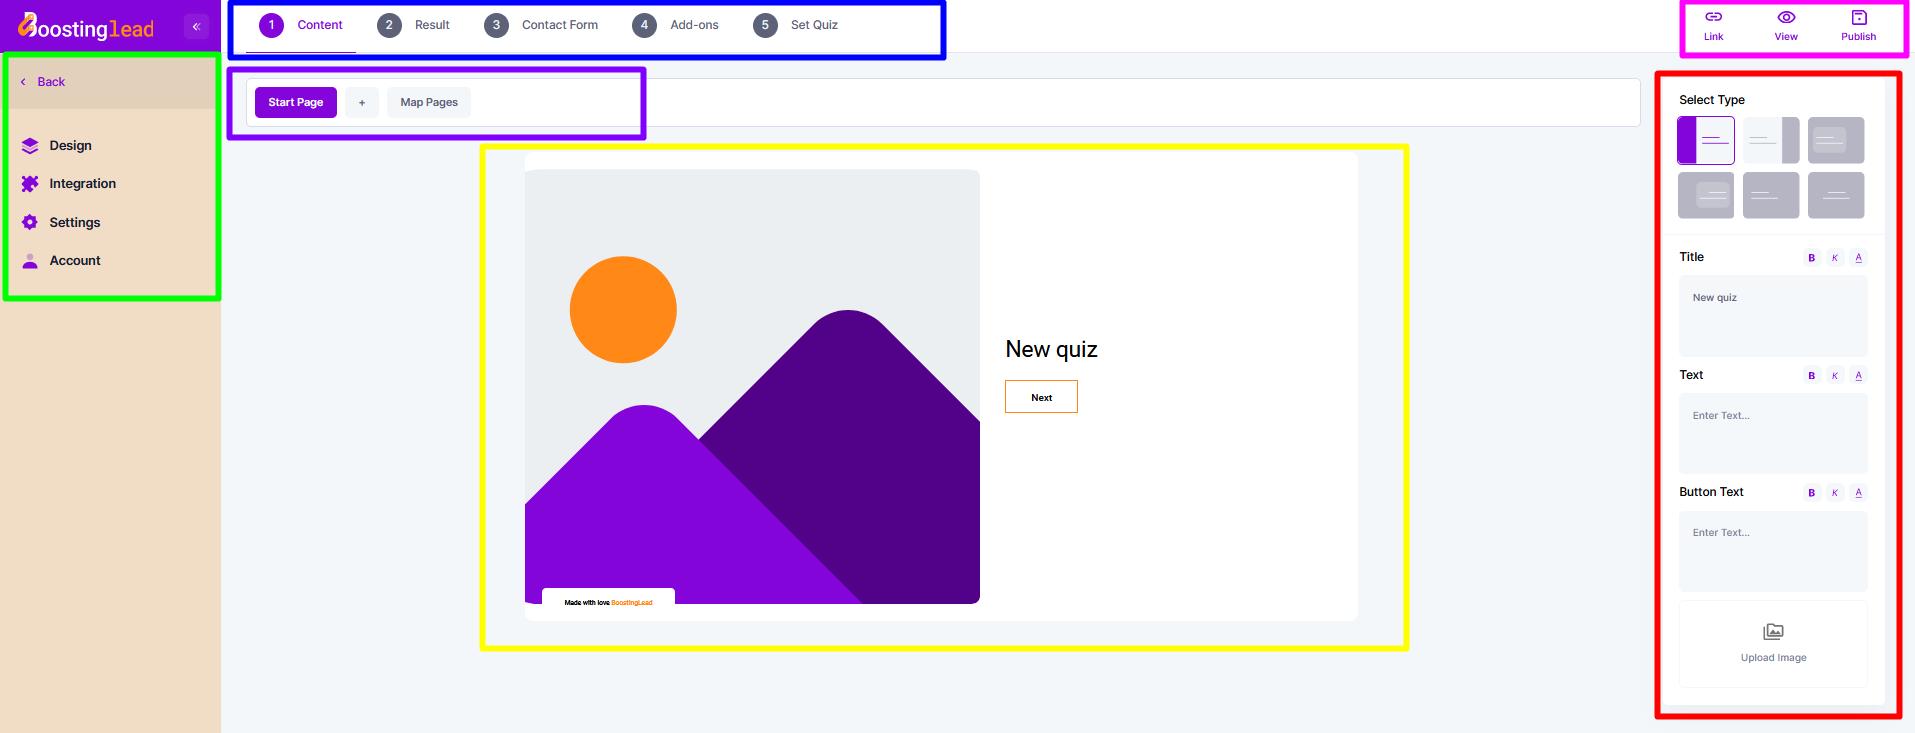
Sections on the left contain general settings for a specific quiz.
At the top is a panel with navigable quiz configuration stages.
Above the stage panel is another panel related to the specific stage.
In the center is the viewing area, displaying all changes made to the created quiz.
Top right has buttons for Links, Preview, and Publishing.
On the right side is a panel for configuring specific sections or stages, where all changes to the quiz are made.
6. Quiz Sections
6.1 Customizing Quiz Design
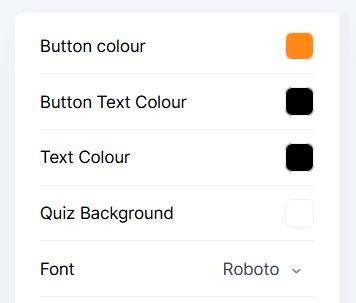
In the Design section, you can customize the overall quiz design:
- colors (Buttons, button text, text, background);
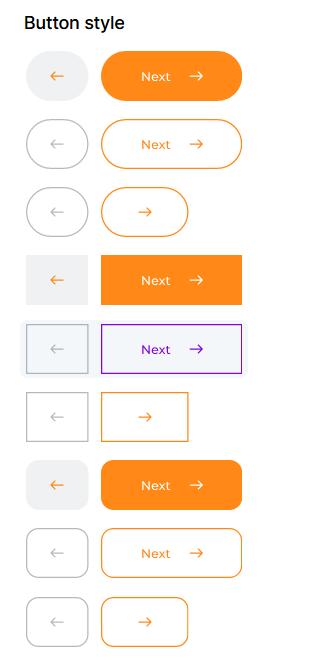
- button type;
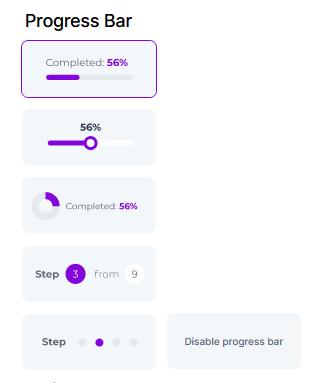
- choose progress bar format or disable it.
6.2 Integration Configuration
In the Integration section, you can configure email integration to receive emails about each new user who completes the quiz at the specified address.
To do this:
- (1) - click on the Email block and toggle the switch;
- (2) - in the settings panel on the right, click on the "Add Email" button;
- (3) - enter the necessary email and click the add email button (checkmark next to the email).
Note: You can add up to 5 emails for each quiz, as well as delete or disable email notifications (by turning off the switch). The language of the lead notification email corresponds to the quiz language.

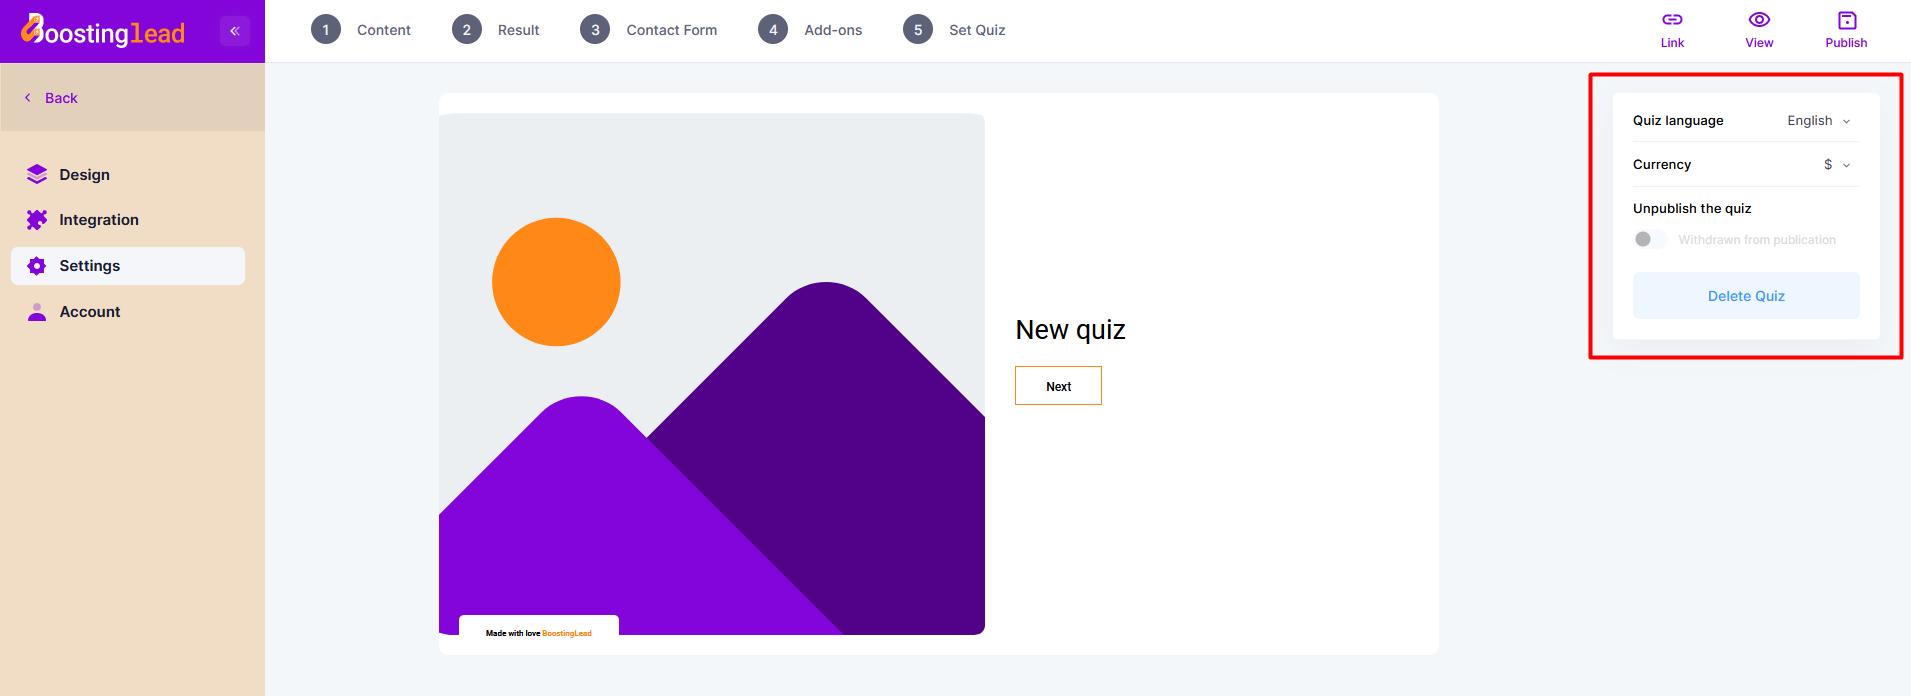
6.3 Quiz Configuration
In the Quiz Configuration section, you can:
- choose the quiz language (the quiz language affects the language of static elements in the created quiz: button text, progress bar text, units of measurement, i.e. static elements visible to the user during the quiz);
- choose the currency (displayed in results if the cost is chosen as the unit of measurement);
- unpublish the quiz (the quiz will not be displayed on the website or through the link);
- delete the quiz.
7. Creating a Quiz
7.1 Content
7.1.1 Start Page
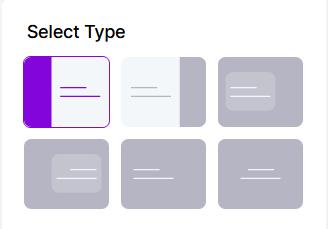
To configure the start page, go to the Content tab and the Start Page sub-tab.

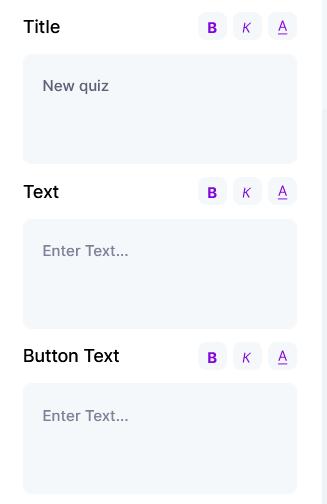
In the settings panel on the right, you can:
- choose the type of start page (its layout);
- add texts (Title, Subtitle, Button Text) in the respective fields;
- add images.
7.1.2 Question Pages Configuration
To create questions:
- go to the Content tab and click on the "+" button;
- go to the desired question.

In the right panel, you can choose the question type.
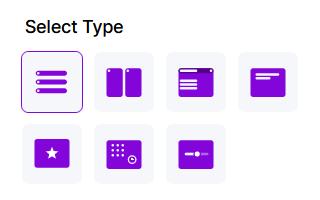
Each question has a title and subtitle, and you can make the question mandatory. However, additional settings may vary depending on the selected question type.
The table provides a list of questions and their settings.
| Question Type | Additional Settings |
|---|---|
Standard Question  | Add emojis as an answer illustration, enable multiple choices (user can select several options).
|
Image-based Question  | Add an image to each answer, enable multiple choices. 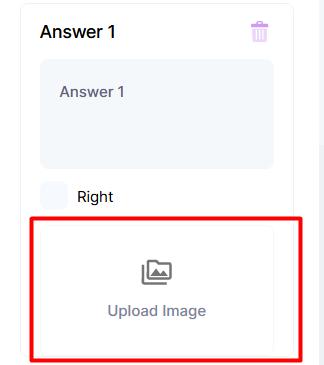 |
Dropdown List  | No additional settings. |
Manual Input  | No additional settings. |
Rating  | Choose display format for rating elements, set maximum rating value (up to 10). 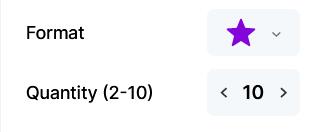 |
Calendar  | Add the option for the user to choose time and select a date or range.  |
Slider  | Set minimum and maximum slider values (from 0 to 100), choose slider format (bi- or unidirectional). 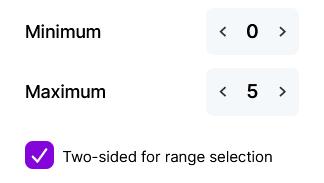 |
7.1.3 Page Map
To configure the logic of questions, go to the Content tab and the Page Map sub-tab.
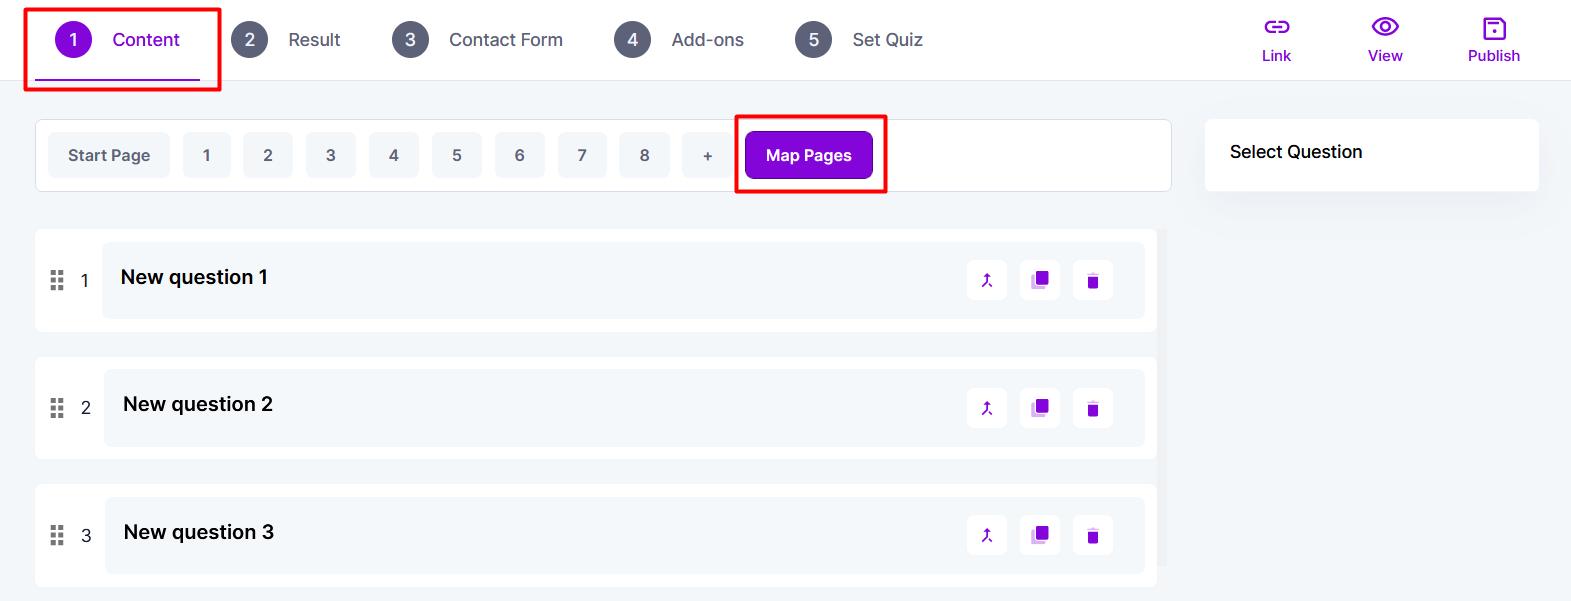
On the page map, you can:
- (1) - move questions (click the left mouse button and drag the desired question);
- (2) - configure the display logic of a specific question;
- (3) - copy the question (the question is copied without logic settings);
- (4) - delete the question.

To configure the logic, click the respective button next to a specific question and set the display conditions in the panel on the right.
Note:
- logic cannot be set for the first question as it uses only previous questions;
- if a question with configured logic is moved before a question involved in the logic, the logic will be reset;
- multiple conditions for display can be set for each question (up to 100).
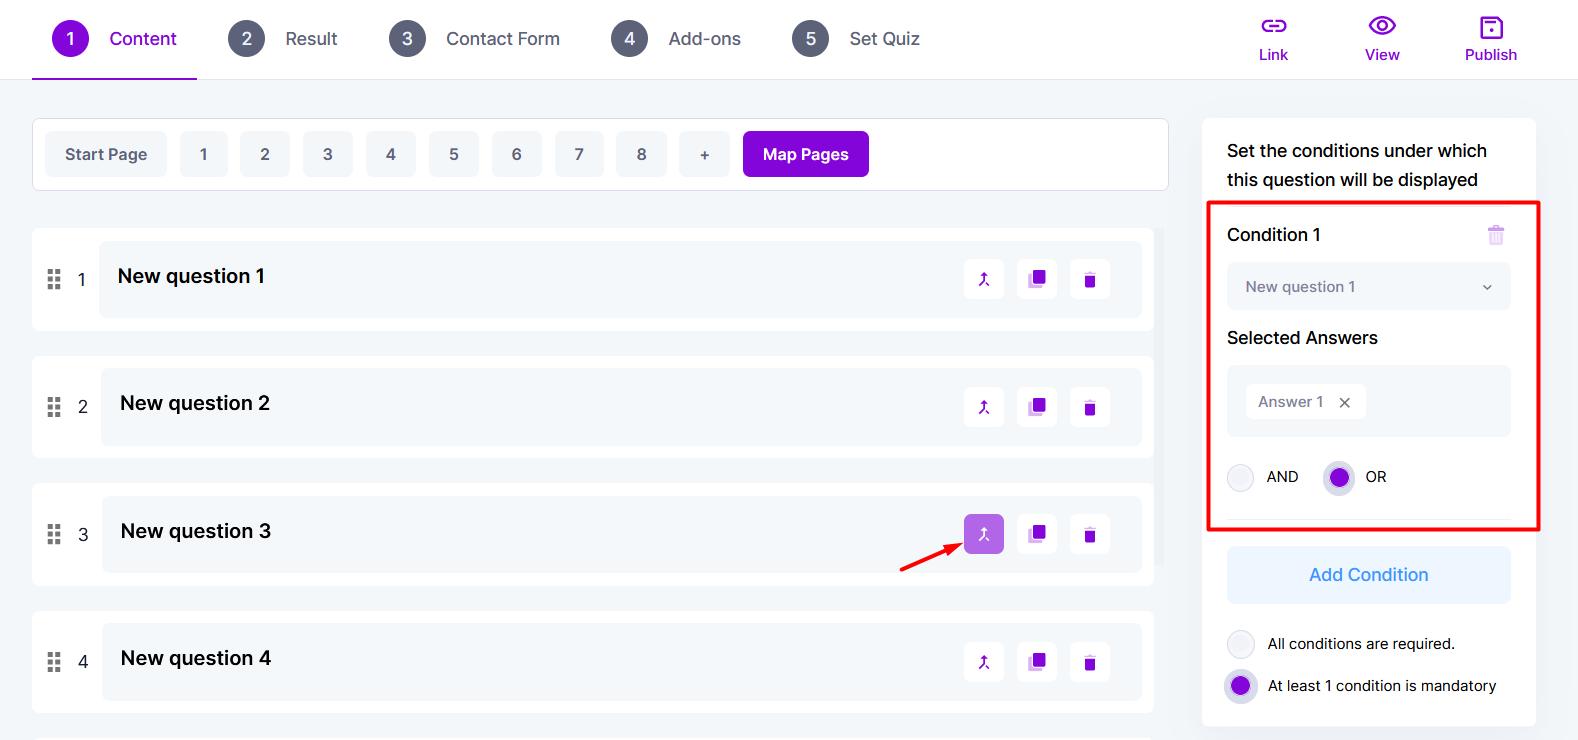
Display conditions may vary depending on the question type chosen for the condition. The table provides details for each question and the available condition options.
| Explanation of Conditions | Condition Screenshot |
|---|---|
| Standard Question, Image-based Question | |
| Choose answer options and Format AND (available for multiple-choice question format when the question should be displayed only when the user selects two or more options) and Format OR (the question is displayed when one or all of the listed options are chosen). | 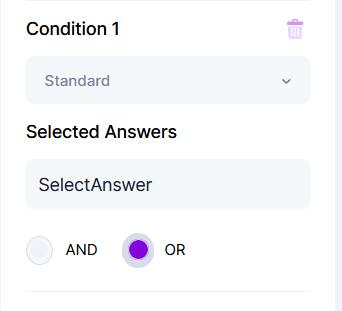 |
| Dropdown List | |
| Conditions similar to Standard and Image-based questions, except that the multiple-choice format is not available, corresponding to condition AND. | 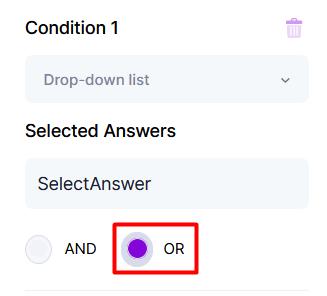 |
| Input | |
| Here, you can specify words that should be present or absent in the user's answer. | 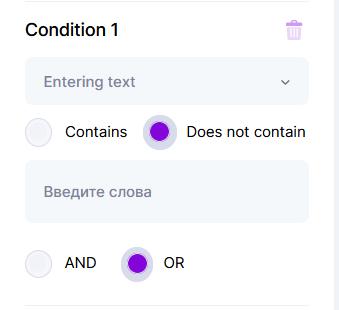 |
| Rating, Unidirectional Slider | |
| For these types of questions, you can choose a condition format (in range, greater than, less than, equals) and specify values that should trigger the question. In other words, if the answer falls within the specified range, the question is displayed. | 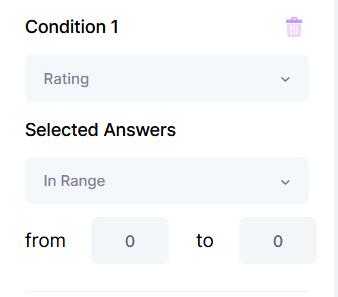 |
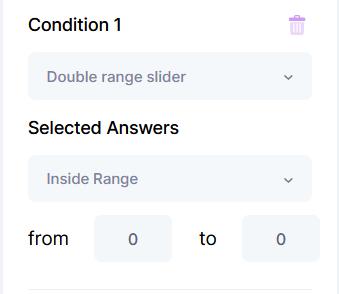
| Bidirectional Slider | |
Similar to the rating and unidirectional slider questions, with the following condition formats:
|  |
Note:
- for a single question, there can be multiple mandatory conditions to choose from
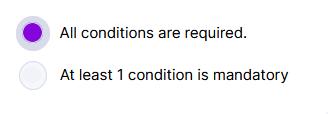
- calendar-type question cannot participate in the logic configuration.
7.2 Results
Making a quiz can be created with questions only but it is recommended to add results as well. Results are the summary of the quiz for the user, what they see after answering the questions when they provide their contact information.
In the results, you can display:
- recommendations for products or services;
- calculated cost of a product or service;
- total points.
7.2.1 Creating a Result
To create a result, go to the Results tab and click on the "Create Result" field.
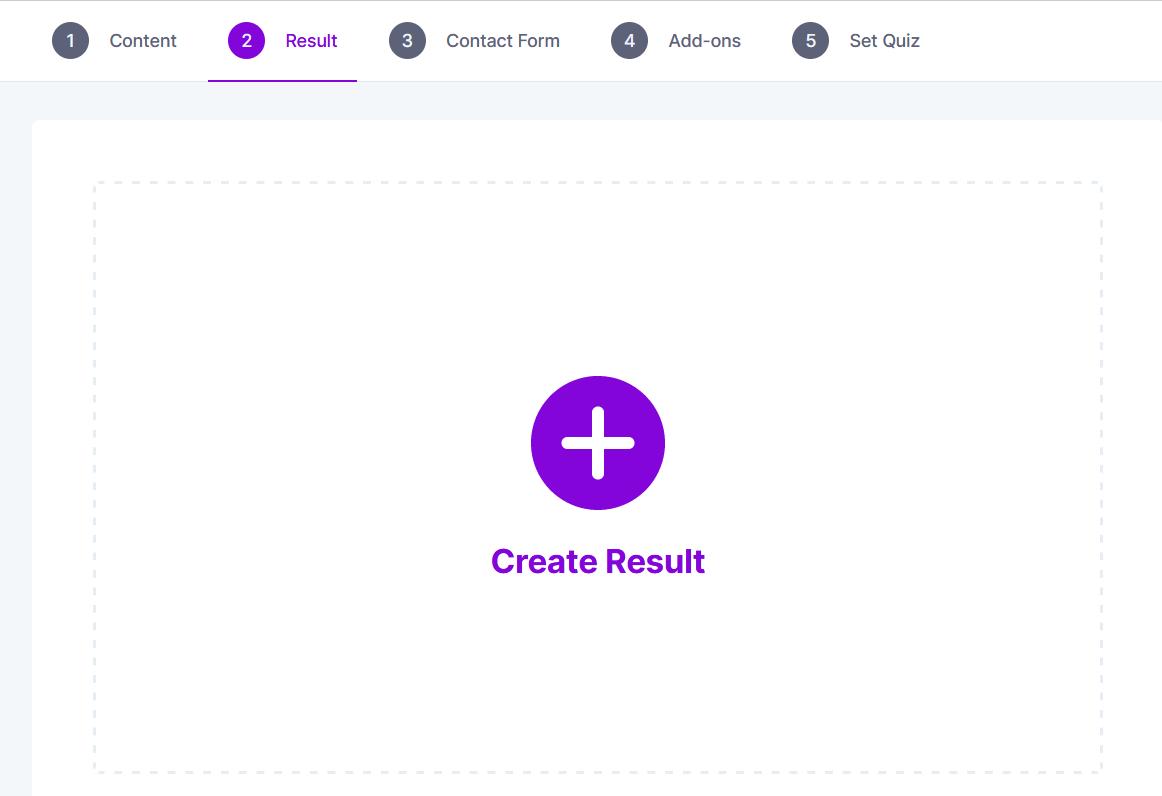
After that, the first result will appear, with tabs to switch between results and with general result settings. Additionally, on the right, there is a panel to configure the specific result.
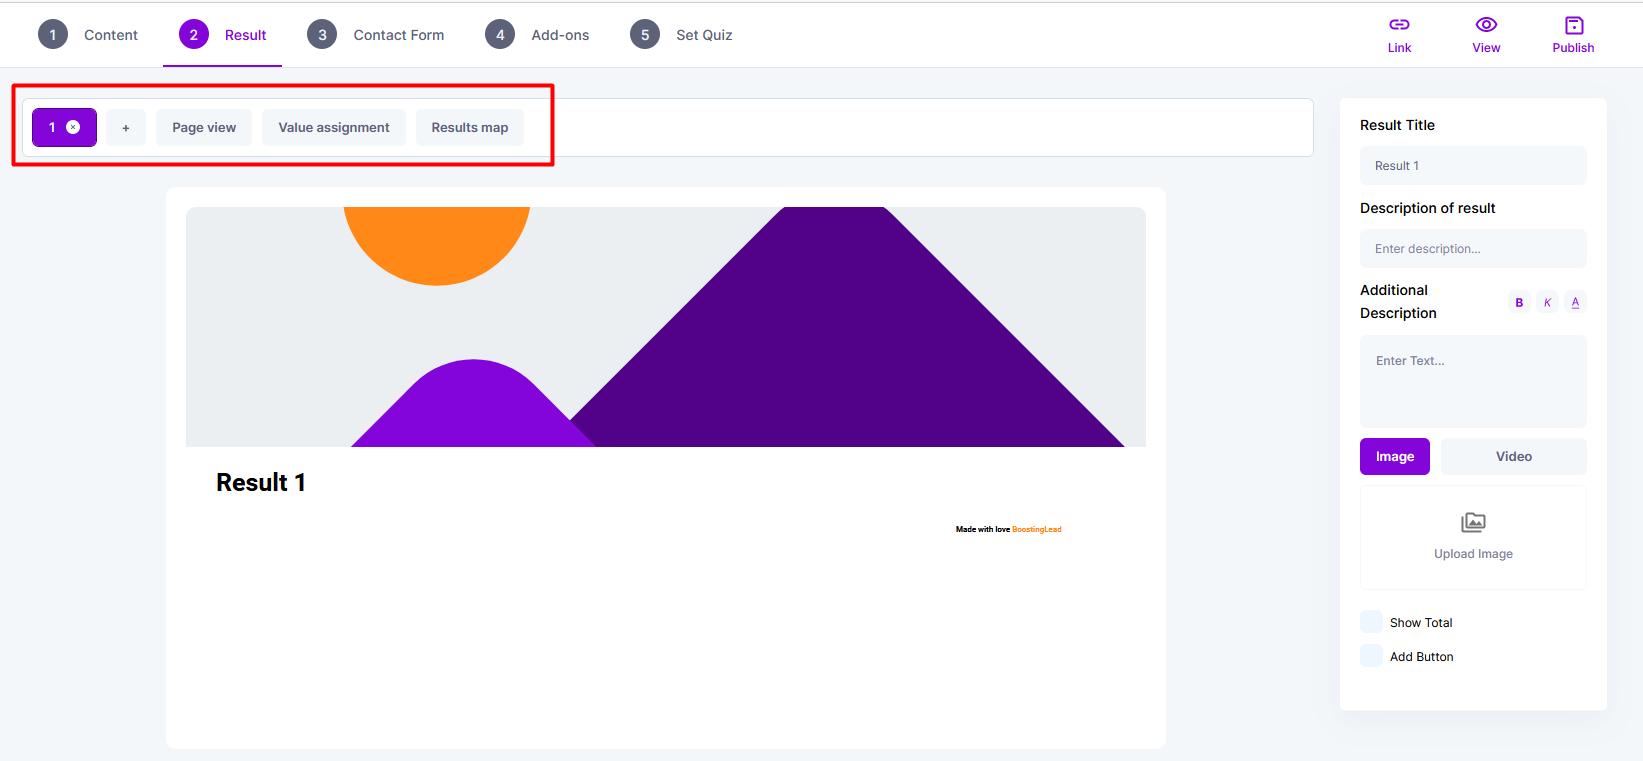
To create another result, similar to creating questions, click the "+" button.

7.2.2 Specific Result Configuration
To configure a result, select the desired one by clicking on the corresponding number.

Next, in the settings panel on the right, fill in all the necessary fields.
- 1. You can add a Title, Description, and Additional description to the result.
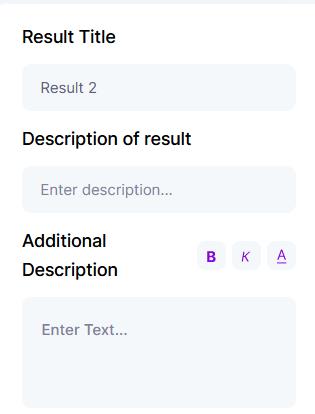
- 2. Add an image for the result or a link to a YouTube video.
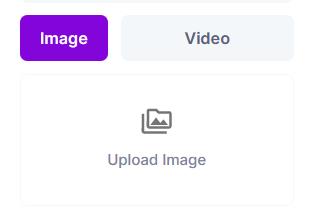
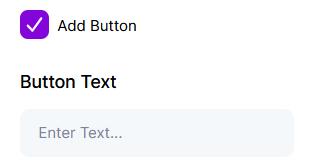
- 3. There are also two optional checkboxes: Show Summary and Add Button.

Regarding these two items in more detail:
Add Button - adds a button to the result so that the user can directly go from the result to a product on the website, for example. However, this button's functionality is only available when the settings indicate that results should be displayed after the contact form.
If results are displayed before the contact form, the button cannot be removed, and links cannot be added. Only text can be written. This is done to ensure that the user always lands on the contact form page and provides their contact information.
Show Summary - a more advanced feature that allows displaying three value options in the result: Fixed Value or Value Range, Calculation Result by Formula, Points Total. You can also choose units of measurement from the dropdown that will be displayed next to the specified or calculated value.
const - a fixed value (to specify one value, uncheck the value range), or a range that can be specified, and it will be displayed in the result.
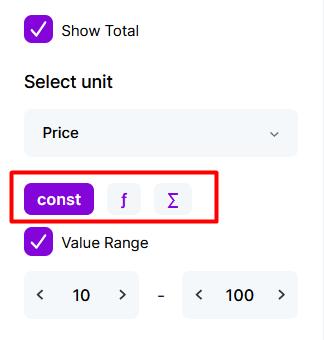
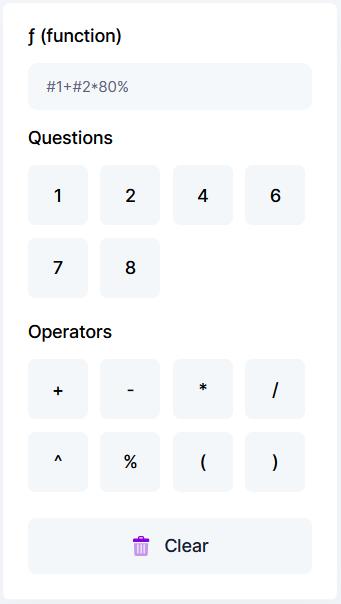
f (function)> - functionality that allows calculating the summary value based on user responses. Here you can set an individual formula that will calculate the answer only for this specific result, or use a general one (the formula guide will be explained a bit further).
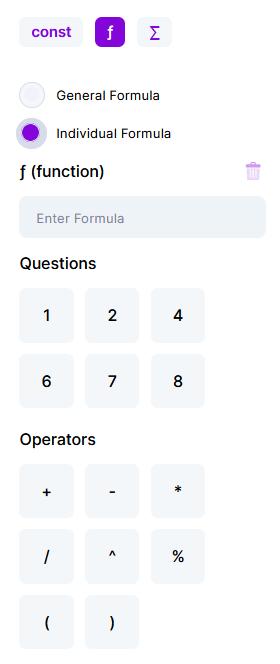
∑ (sum) - displays the total sum of points from the user's responses. It's almost the same formula but always calculates the sum.

7.2.3 Results Display Configuration
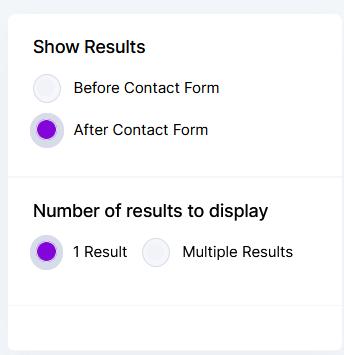
On the Results tab, under the Page View sub-tab, you can set the general display for results.

Here, in the settings panel on the right, you can choose where the results will be displayed (before or after the contact form) and the number of results the user will see (1 or several).
7.2.4 Answer Values and General Formula Configuration
To assign values to each answer and set up a general formula, go to the Results tab, under the Assign Values sub-tab.

In the center of the display panel, you can open the necessary question and assign values to each answer. These values will be added when selecting the display format of Sum or calculated by the formula, if specified.

Note:
- not all questions have standard answer options, so for such questions as rating, one-sided slider the value chosen by the user is pulled into the formula;
- question types: manual input, calendar, bidirectional slider are not involved in calculations and cannot be added to the formula.
How the Formula Works
The logic of the built-in calculator completely corresponds to how a regular calculator works. For convenience, questions participating in the formula and operators are displayed in the calculator panel.
Calculation of the answer
The formula specifies the question, and the value is taken from what is assigned to the answer in this question. For example, we have a question "What do you like more?" with assigned values "Beach vacation (5 points)" and "Day off vacation (3 points)." In this case, if the user chooses “Beach vacation”, the value 5 will go into the formula, and if “Day off vacation” - 3. If multiple-choice is available for such a question, and the user chooses both, the formula will include the sum of 5+3.
7.2.5 Results Display Logic Configuration
Conditions under which one result or another will be displayed are configured on the Results tab, under the Result Map sub-tab.

To set display conditions for a specific result, click the Format button next to the desired result.

In the settings panel on the right, there are several options for specifying display conditions. Further details on each format are provided in the table.
| Format | Description |
|---|---|
No Logic  | This format is default, meaning the result will be displayed to the user in any case, regardless of their answers. |
Logic  | Configured similarly to logic for questions. That is, a question and the answer option that should be. This is described in the question logic, so we won't dwell on this again. |
Function  | Here, you can also choose a general function to enter an individual one for a specific result. Additionally, specify the range into which the function calculation should fall to reflect the result to the user. |
Points  | By choosing points, you can also specify whether the calculated sum of points should fall within a range, be greater than, be less than, or equal to a specified value. |
7.3 Contact Form
This is one of the main pages, as it is here that the user leaves their contact information. In other words, on this page, we obtain what the quiz is primarily created for - lead contact data. To configure, go to the Contact Form tab and in the right settings panel, add the necessary information.
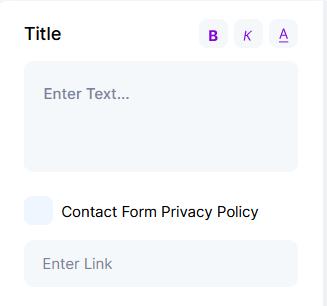
Here, you can add text that motivates users to leave their contacts, as well as a link to your company's privacy policy.
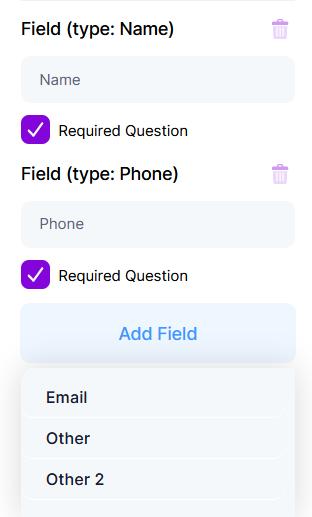
You can also add fields for entering contact information (up to 4 fields) by selecting them from the dropdown.
You can also add messengers, providing the user with an alternative way to leave their contacts.
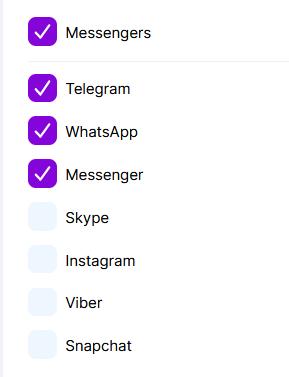
Also, at the bottom of the right settings panel, there is a button to configure the Thank You Page. By clicking on it, you will go to the Thank You page  , where you can enter the Title and additional description.
7.4 Add-ons Configuration
Add-ons are presented in the form of Discounts (fixed or increasing), Bonuses (guide, catalog, or any format suitable for a specific site), and a Consultant (the ability to add a hint or additional information displayed on almost every page).
To configure Add-ons, go to the Add-ons tab.

You can choose on which pages add-ons will be displayed, as well as where exactly they will be shown (on the right or left).
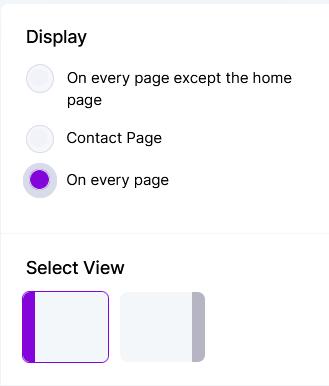
You can add no more than three add-ons.
7.5 Quiz Installation
We've covered how to create a quiz. Now you need to post it on your website. The last step is to install the quiz. To do this, go to the Quiz Installation tab and choose the required format.

The layout of each format is displayed in the central preview panel, and the necessary settings are in the right settings panel.
After selecting and configuring the required installation format , copy the code and add it to your site to display the quiz. The code is located in the bottom right settings panel, and is unique for each format.
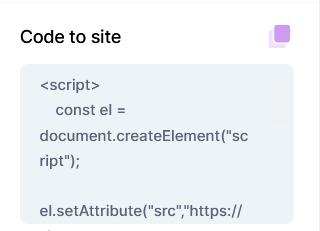
Also, for the quiz to appear on the site, it must be published. To do this, click the Publish button at the top right and confirm the quiz publication.

Next to the Publish button, there are additional buttons:
View  - opens your quiz in the player so you can go through it before publication and check if everything is set up correctly.
Link  - copies the link to the quiz, which is active only when the quiz is published. You can share the link to your survey in private messages or newsletters.
